|
|
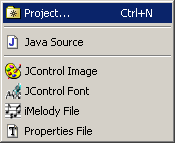
Creating New ProjectsThere are several ways to create a new JControl project:
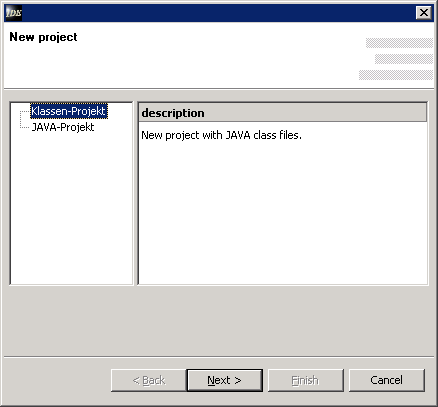
You can access this menu by using the main menu bar (Project->New), or by opening the context menu of the workspace area, or by clicking the small arrow beside the "New" icon in the Icon Bar. Following each of these actions, the project wizard appears, which displays a series of dialogs through which all project relevant settings can be changed. The first dialog (fig. 1) is used for specifying the project type. This property cannot be changed anymore after the project is created. There are two possible project types:
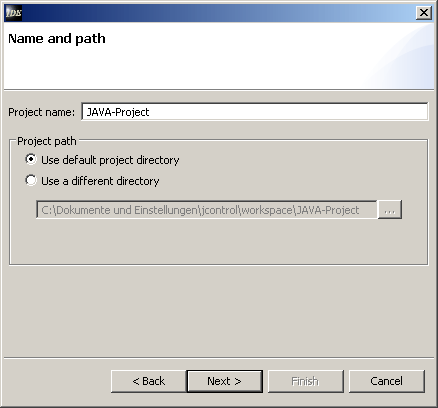
After selecting the desired project type, a click on the button Next leads to the second dialog (fig. 2). Here it is necessary to enter a project name as well as the project location, the directory where all the project's files will be stored. The preselected directory is located in the default project directory that can be changed in the global path settings dialog. If you would like to use a custom directory please select the corresponding checkbox. The project location is not changeable once the project has been created, but the project name can be modified any time.
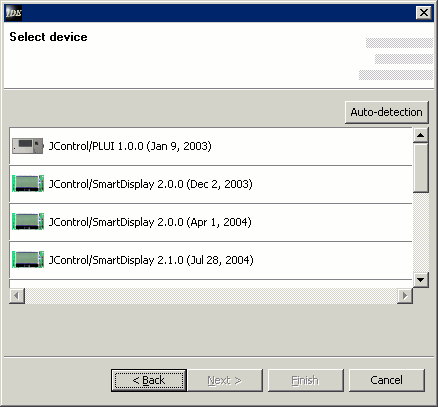
After deciding the name and location of the project the button Next leads to the next dialog (fig. 3), where the JControl device to run the new project on can be selected (e.g. JControl/SmartDisplay). The button Auto-detection scans for connected JControl devices (those which are in download mode) and automatically selects the matching profile from the list. The target JControl device can be changed any time later on via the projects properties menu.
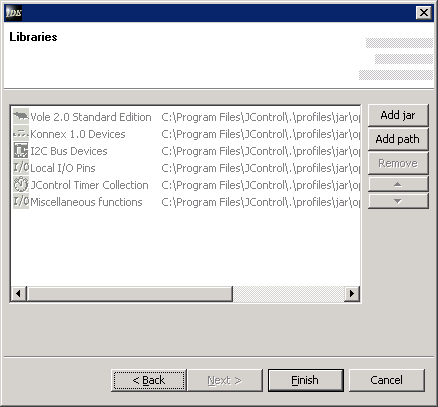
Note: If the automatic device detection fails, the reason could be that your version of the JControl/IDE doesn't support the device yet. In this case a current set of device profiles will solve the issue. By clicking the button Finish the new project will be instantly created. Alternatively, the button Next leads to another dialog, which allows you to add additional libraries to your project (fig. 4).
In this dialog a list of all JAVA™ libraries used in the project is displayed. The standard libraries offered by the target device are displayed in a light gray, which indicates that it is not possible to remove them. Additional application specific libraries in form of JAR archives or class folders can be added and removed. Note: Application specific libraries can be added and removed any time after the creation of the project through its properties dialog. Through the two arrow buttons at the right side of the dialog the order of the libraries can be changed. During the compilation, the listed libraries are linked in the displayed order (top to bottom) to the project. In case of duplicate classes, the ones linked first are used. A click on the button Finish ends the wizard. The newly created project can be found under its name in the workspace. |


 Creating New Projects